Knowledge Base
Anti-Glare Screen Protector Installation Instructions
Published: January 14, 2015
Updated: December 22, 2015
Please follow the tutorial below to properly install your anti-glare screen protector.Updated: December 22, 2015
Materials Required:
- Screen Protector
- Micro-Fiber Cloth
- Screen Cleaning Solution
- Scotch Tape
- Flat Edge Tool
Step 1: Cleaning
Use the micro-fiber cloth and cleaning solution to clean your screen completely. Make sure your screen is entirely clean and dry before starting. You will also want to wash and dry your hands.
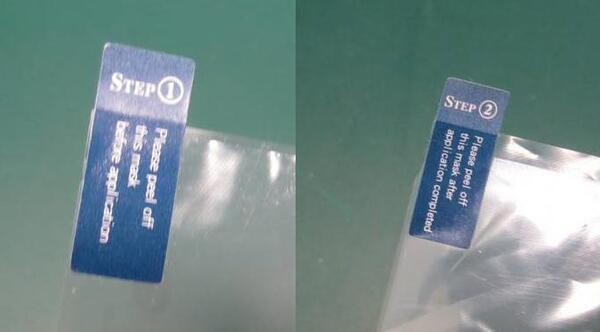
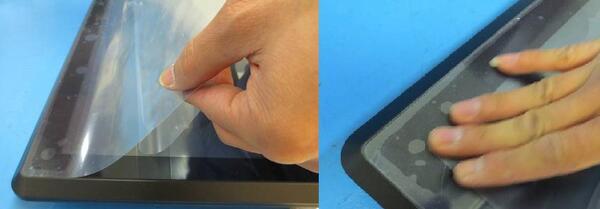
Step 2: Identifying the Anti-Glare Protector Tabs
The front and rear protective film have tabs, the anti-glare screen protector does not. The tab labeled “Step 1” is the back side and should be facing towards your monitor. The tab labeled “Step 2” is the front and should be facing out, away from your monitor; do not remove the front film until installation is completed.
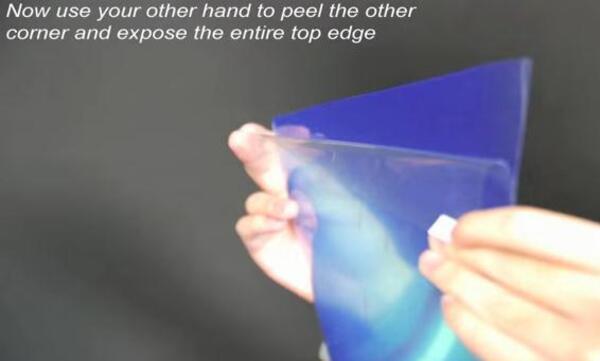
Step 3: Exposing the Anti-Glare Protector
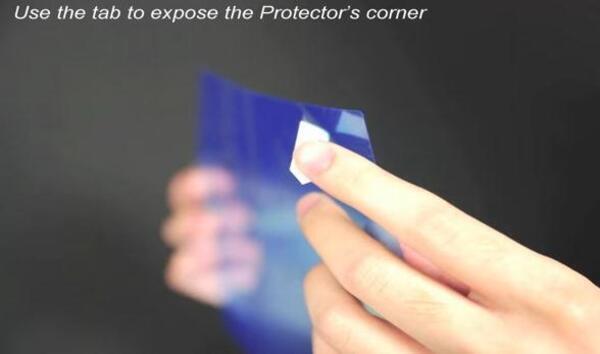
Start from the top edge and fold back the tab labeled “Step 1” so you can hold it between your fingers. Use other hand to peel the second top corner to expose the entire top edge. Using this method will help minimize exposure to dust in the air.
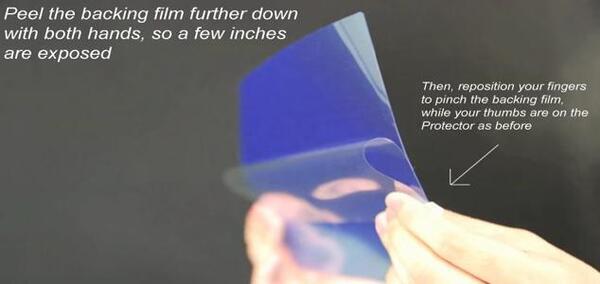
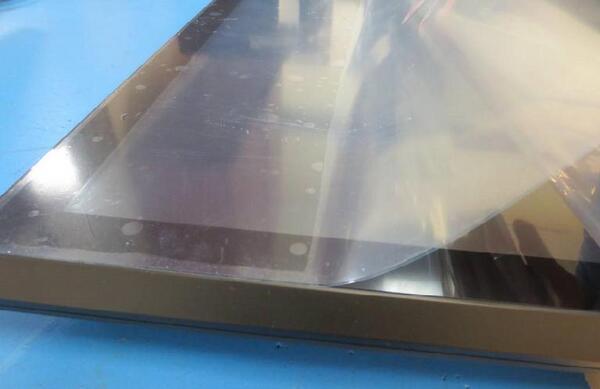
Peel the backing film further down with both hands, so a few inches of the back is exposed. Then reposition your fingers to pinch the backing film as before.
Step 4: Alignment and Attachment
Now lay the anti-glare screen protector down and align the top edge with the top edge of the screen. Once you have the screen protector perfectly aligned, allow the adhesive to stick. As the protector attaches slowly peel off more of the backing film. While pulling the backing film downward with one hand, use a micro fiber cloth to smooth the screen protector as it attaches to the screen.
Step 5: Cleaning and wrap-up
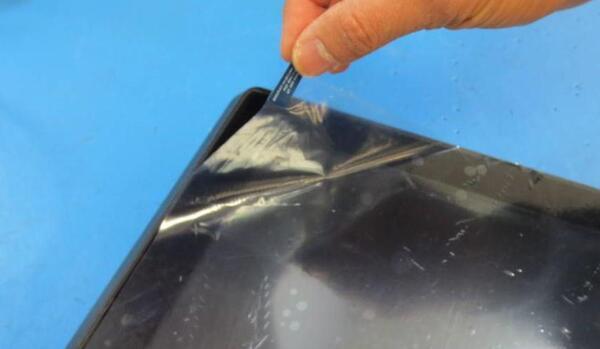
To finish, use the micro-fiber cloth to push out bubbles towards and off the edges of the screen and wipe off any smudges. Now you can remove the front film by peeling it off using the tab labeled “Step 2”.
Tips:
Lift the protector partially off the screen using a piece of Scotch tape on the protector’s corner to partially lift it off. Use the flat edge tool to help remove any remaining bubbles or ripples If you have a piece of dust under the screen protector, use a piece of Scotch tape, sticky side out to remove the dust. Let the screen protector reattach while smoothing it down; repeat if needed.
The Installation is Complete!
Attachments:
Download file 1