Knowledge Base
How to restore an image using ADI
Updated: March 3, 2021
Warning: Following the procedure below will erase all previous data on your HDD. Please make sure to back up any important data before continuing.
To restore an image using Active@ Disk Image, start with the computer powered off for Windows 7 or reboot the computer if running Windows 8.1 or 10, with the Recovery Drive inserted into a USB3.0 port on the unit.
Boot to the thumb drive by launching the Boot Menu. Most Cybernet units use F11. The Cybernet/CyberMed-T10C uses F5 and the IPC-R1 uses F7.
Once the boot menu appears, select the Active@ Disk flash drive. When Active@ Disk Image loads, select "Image to Disk" to restore your operating system.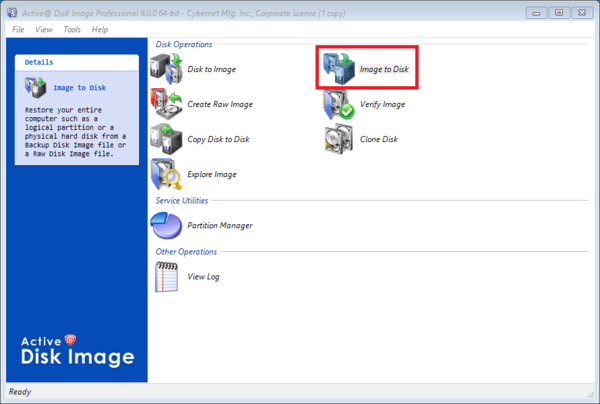
The first screen is only informational, click "Next" to advance to the next screen.
Now you will be asked to locate the image to be restored. Click "Browse".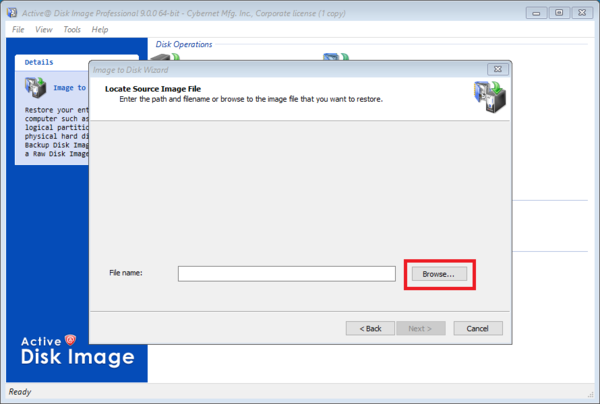
Select the drop down menu to locate the drive labeled "Other Files".
Locate the folder that contains the Active@ Disk Image file you wish to restore. This image will end with an .ADI file extension.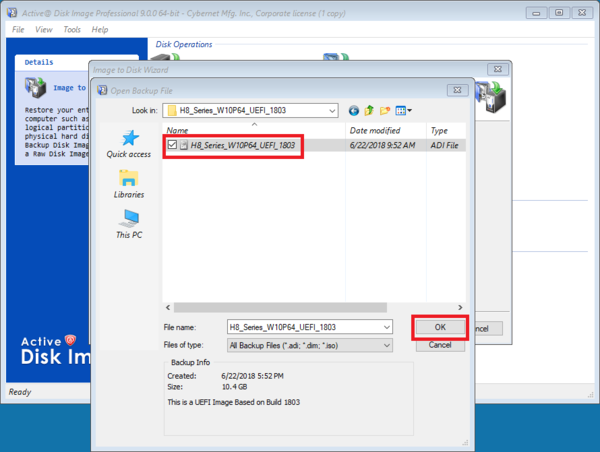
Once you have selected the correct image file, click next to move on to the next step.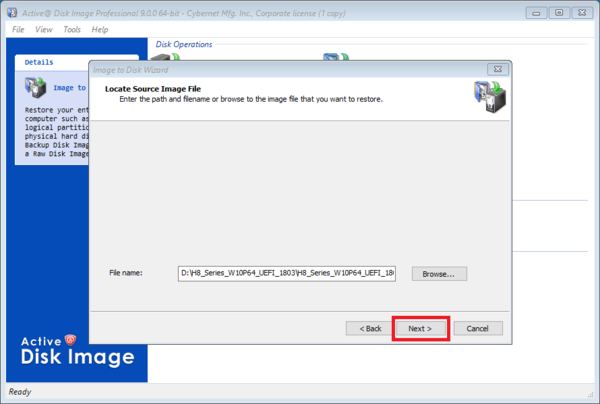
In the first part of the setup phase, you will select the partitions in the image you want to restore. Since we are performing a full restoration, you will need to check the box that represents the entire drive, located at the top. Then click next.
Next, you will be asked to select the destination drive. Since we want the image to be restored to the main drive, you will need to highlight Disk 0. Uncheck the "Keep original size and location of partitions" box, then click "Next".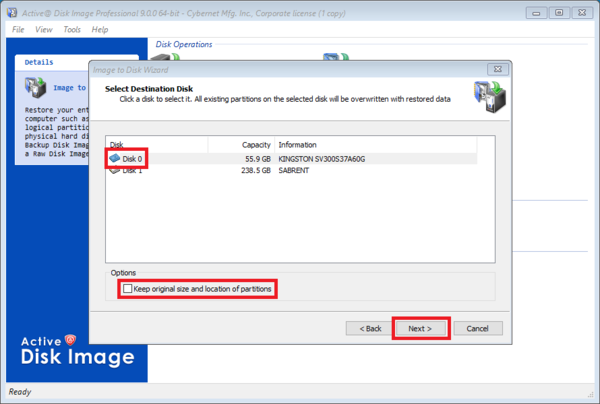
Now you will be asked if you want to delete the data on the drive you selected. Before restoring an image, you should have already made a backup if you want to save any data, so you can safely select yes to deleting the data and click "Next".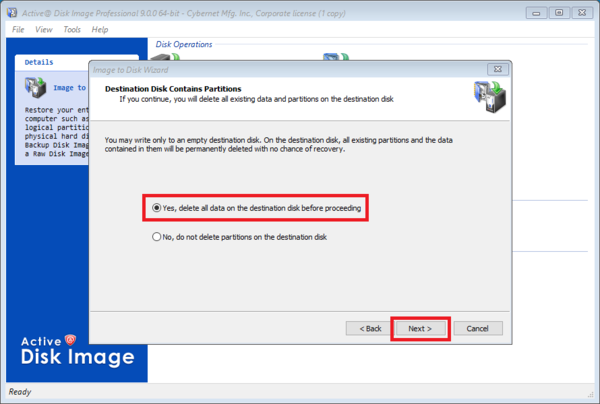
Now you will be asked if you want to restore another partition or disk. Since we are performing a full restoration, you will select no and click next.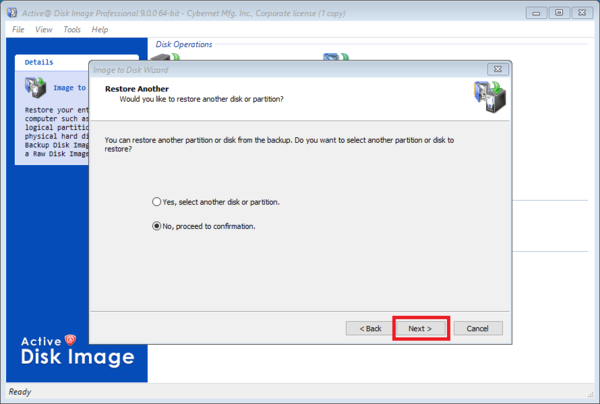
The last step is to confirm the setup configuration. Click "Next" after verifying that everything is setup according to the previous steps. Once everything is confirmed to be correct, click "Next".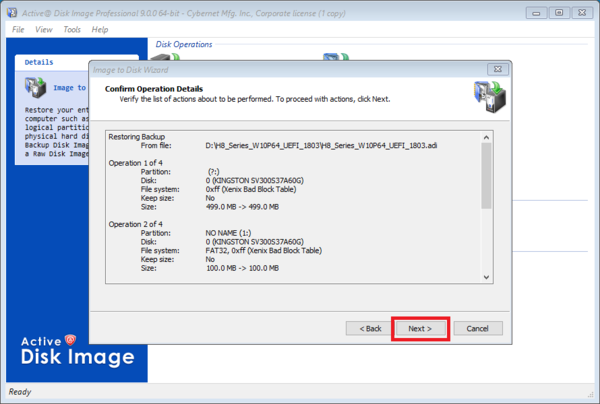
At this point the Active@ Disk Image software will start the restoration process. This will take 7-10 minutes depending on the size of the image.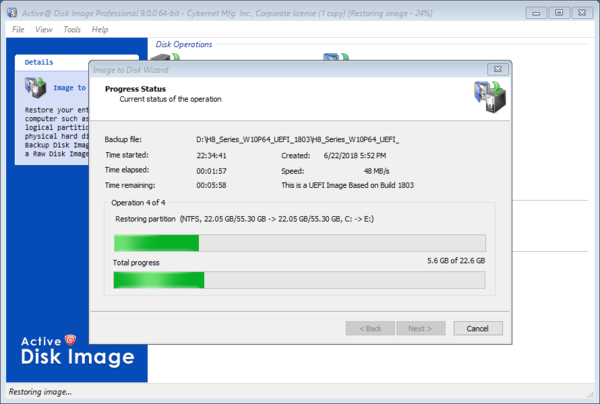
Once Restoration is complete, you only need to click "Finish".
Remove the flash drive from the USB port and then Restart the computer. Your unit should reboot with a fresh copy of Windows.